
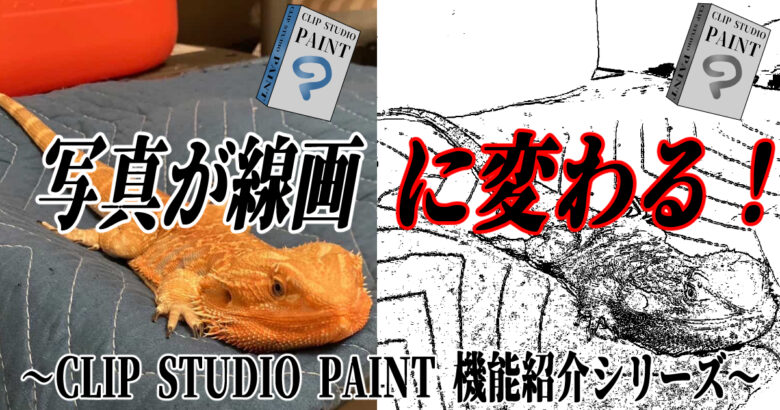
どうも、趣味レーターのAKITΩ(あきと)です!
今回はクリスタ2で追加された自動陰影についての使い方や色々なイラストに使用した例をご紹介します。
個人的には、自動と思えないできで陰影が苦手な人や陰影の時短に使えそうだなと思い記事にしてみました!
クリスタ2にアップデートしないと使えないので、アップデートやそもそものクリスタ2について知りたい場合はこちらがオススメです!
アップデート方法
クリスタ2について
それでは自動陰影についてご紹介します!
自動陰影の使い方
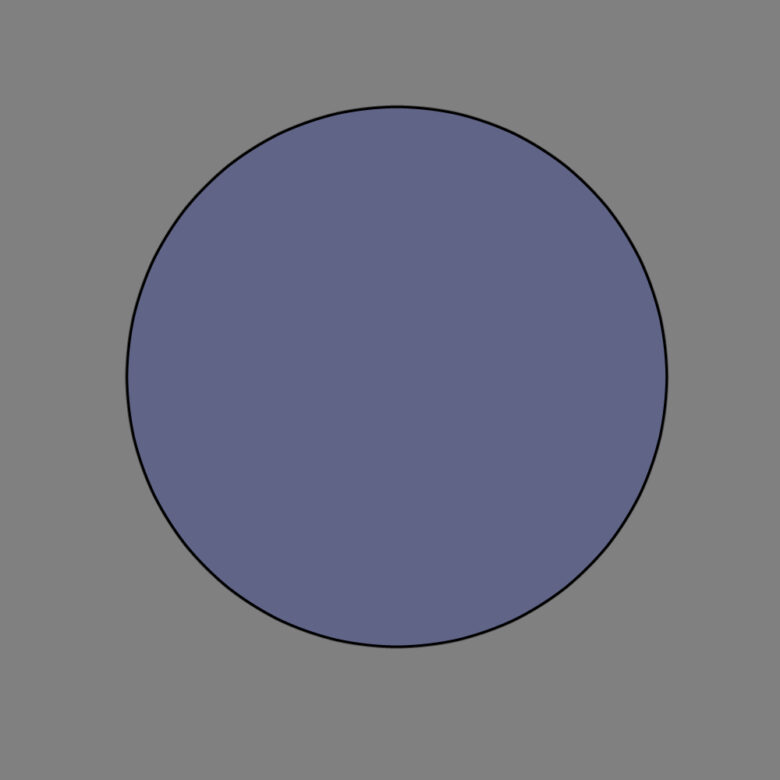
自動陰影のご説明用に球体のイラストを用意しました。
イラスト
レイヤー構成
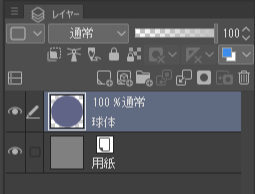
球体レイヤーだけのレイヤー構成のイラストです。
影をつけたい色レイヤーか、色をまとめたフォルダを選択した状態にします。
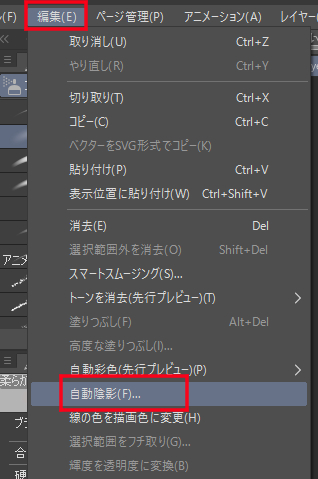
色を選択した状態でメニューバーの「編集」→「自動陰影」を押します。
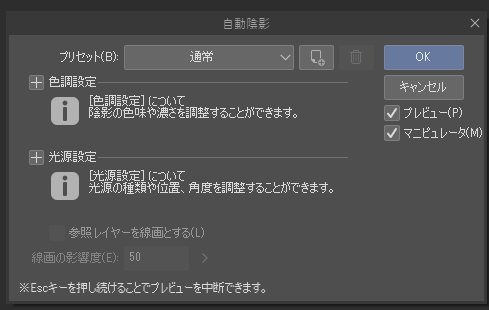
選択したすると自動陰影用のメニューがでます。
今回はそのまま「OK」のところを押して自動陰影をつけます。

自動で陰影がつきました!
比較用


比較すると自然な色味で明るい部分や暗い部分を自動で塗っているのがわかります。
暗い部分の陰影など微調整は必要ですが、影は別レイヤーで作られるので修正も楽です。
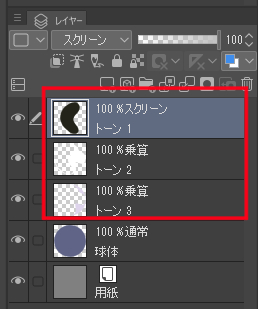
元の色レイヤーとは別にトーンが3つ追加されたので、このトーンを修正するだけで大丈夫です。
自動陰影の詳細設定
それでは自動陰影の各種設定についてご紹介します!
各種設定のご説明用にこちらのイラストを使用します。
ネコのイラストとレイヤー構成
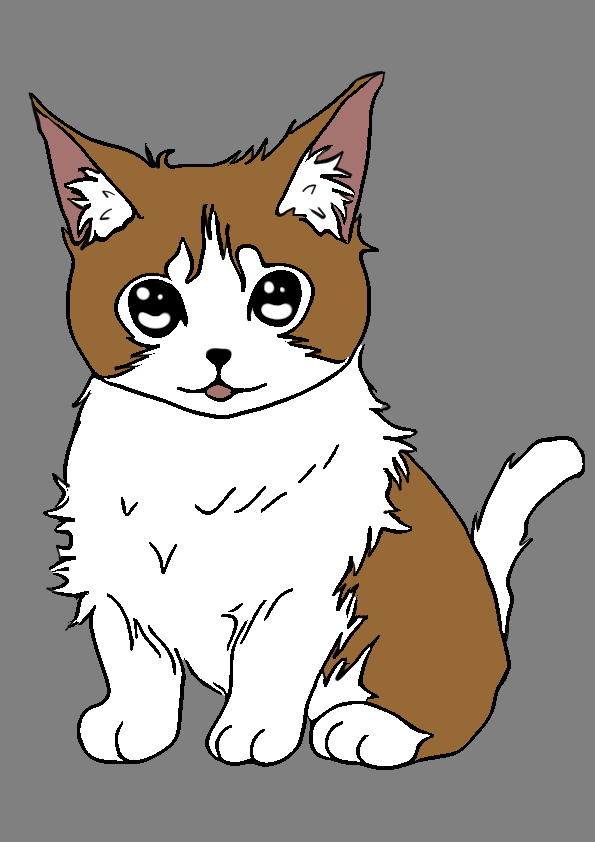
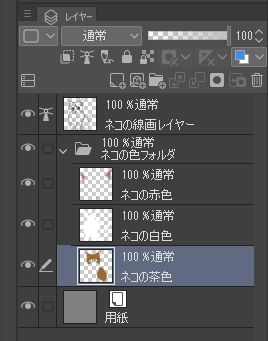
今回はネコのイラストで、線画と複数の色レイヤーをフォルダーにまとめています。
参照レイヤーを線画とする
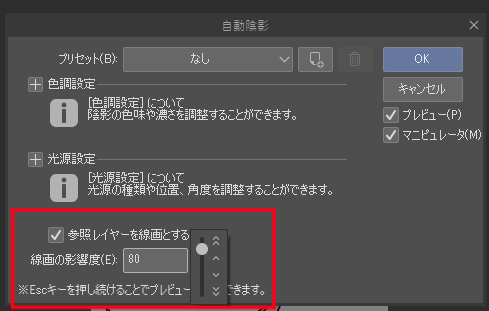
「参照レイヤーを線画とする」にチェックをつけると、線画周りの影の暗さを強調することが可能です。
立体感が増すので、線画があるならチェックをつけるほうがいいと思います。
「参照レイヤーを線画とする」は線画レイヤーを参照レイヤーにしていないとチェックがつけれません。
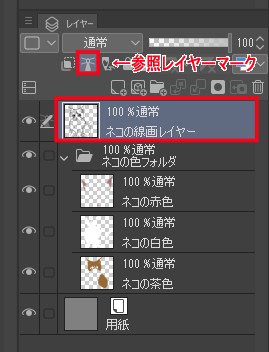
線画を参照レイヤーにするには、線画レイヤーを選択した状態で、参照レイヤーのマークを押すと設定することができます。
線画を参照レイヤーにした状態で、色レイヤーを選択して自動陰影をおこなうとチェックがつけることが可能です。
プリセット
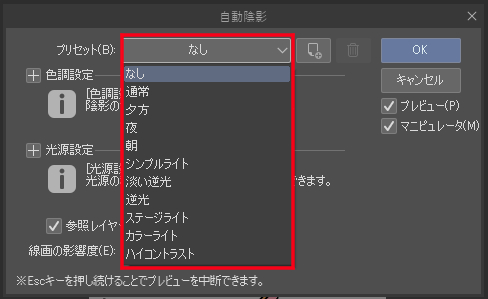
プリセットの部分を押すと、選択した条件に合わせた陰影表現に変えることができます。
例えば、通常の場合はこういうイラストです。

夜の場合はこういう感じになります。
暗い雰囲気の陰影になっていませんか?
比較用

プリセット以外の設定は変えていないですが、陰影表現もかなり変わっています。
色味も自然な感じなので、影色苦手な人は色の参考用として使うこともできそうです。
色調設定

色調設定の文字の左側のプラスマークを押すと、影レイヤーの手動調整ができます。
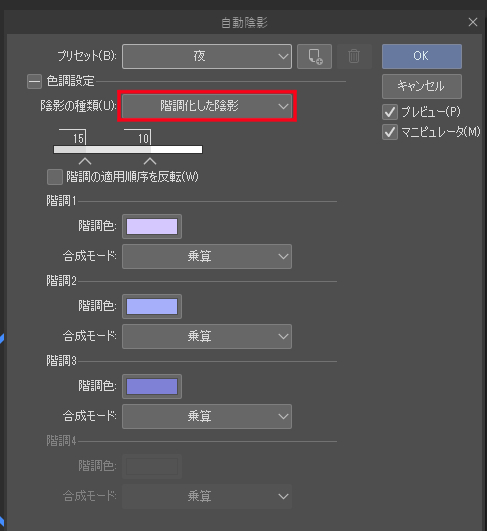
陰影の種類の項目で「階調化した陰影」が選ばれてる場合は、自動陰影される色や合成モードの変更が可能です。
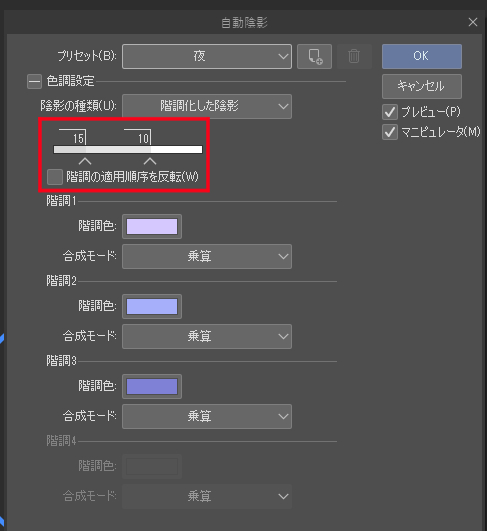
数字がついているバーでは、明るい部分や暗い部分の割合を調整できます。
「階調の適用順序を反転」にチェックをつけると、陰影の明るい部分と暗い部分が真逆になったような表現になります。
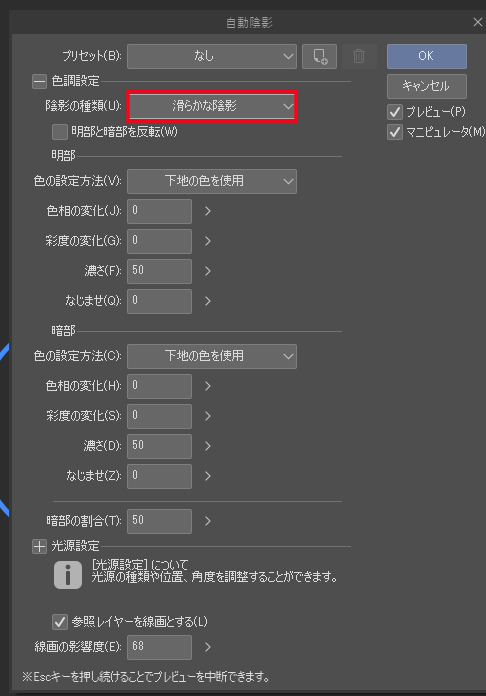
陰影の種類の項目で「なめらかな陰影」が選ばれてる場合は、自動陰影される色や合成モードを自分で調整することができます。
光源設定
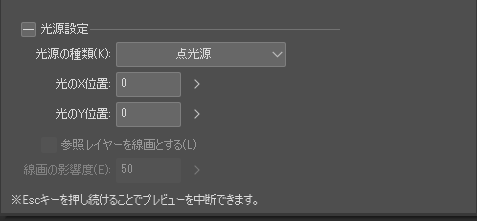
「光源設定」の左側のプラスマークを押すと、「光源設定」の詳細設定ができるメニューがでます。
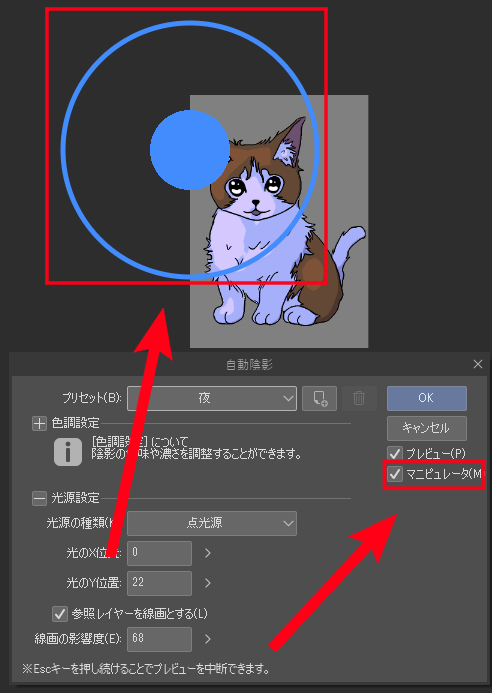
「マニピュレータ」にチェックがついていると、光源の位置を調整できるものが表示されます。
点光源
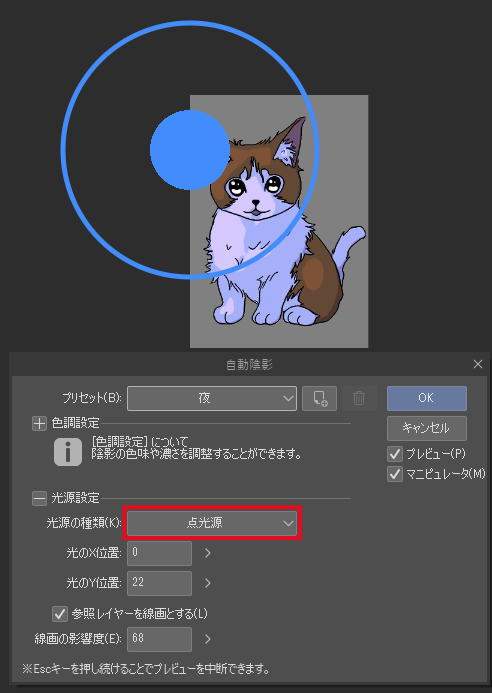
「光源の種類」が「点光源」の場合は、太陽みたいな光丸型光源になります。

光源の位置を変えると、明るくする部分を変えることができます。
平行光源
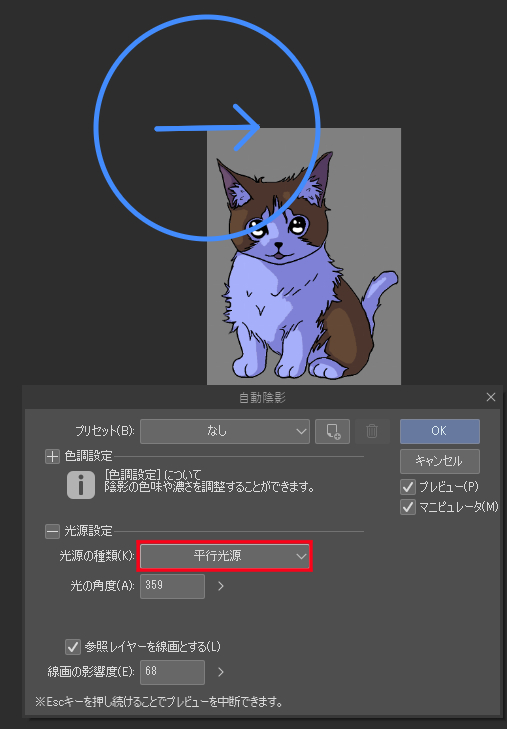
「光源の種類」が「平行光源」の場合は、懐中電灯みたいに矢印マークで光方向を調整できます。
光の強さ
「点光源」と「平行光源」どちらとも外側の〇マークで光の強さを変えられます。
比較用

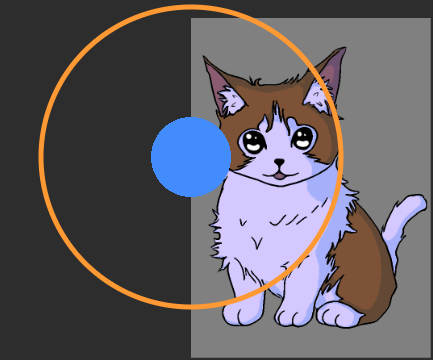
〇を押していると大きさの調整ができるので、丸が大きくなるほど明るさが明るくなります。
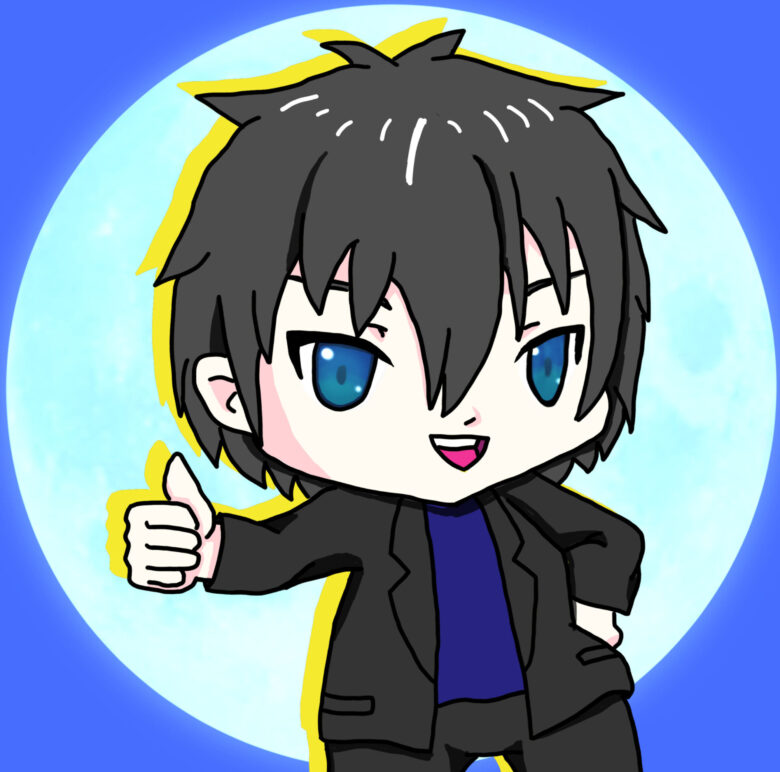
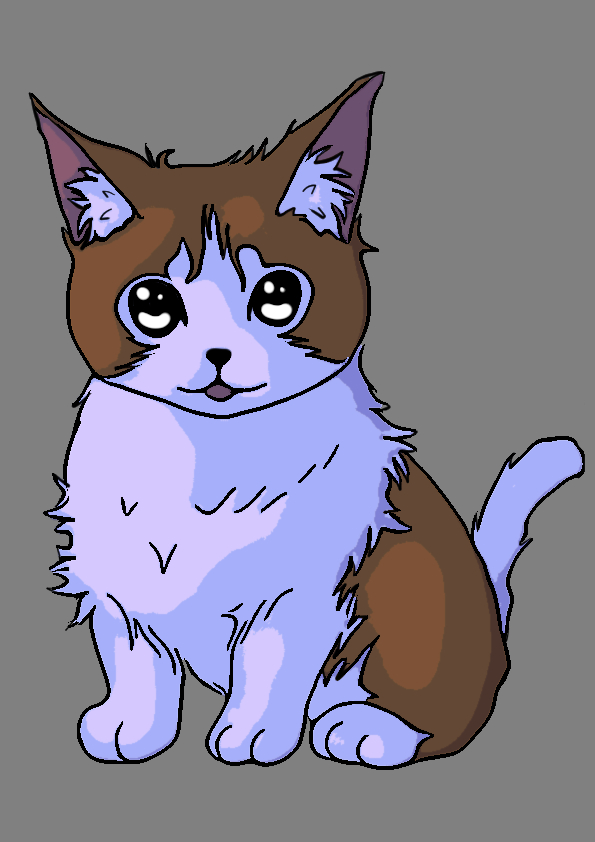
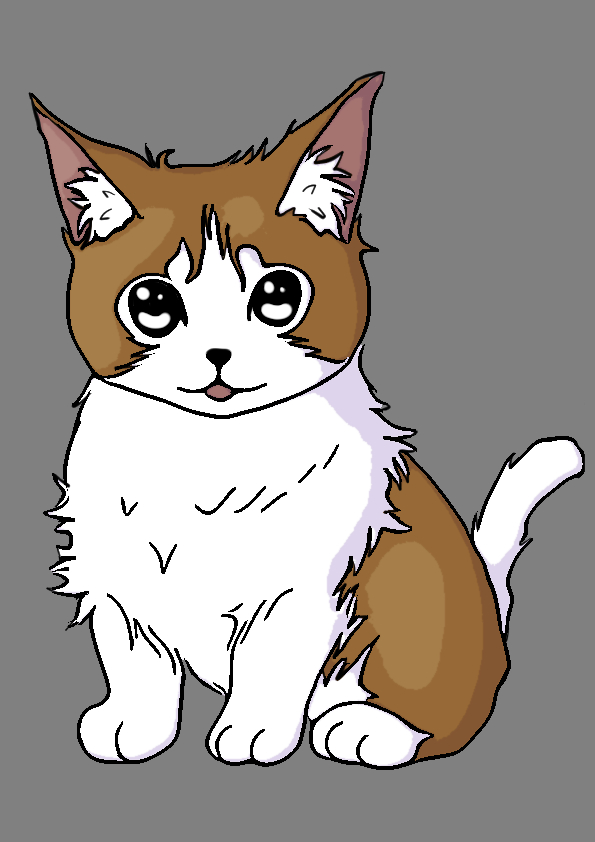
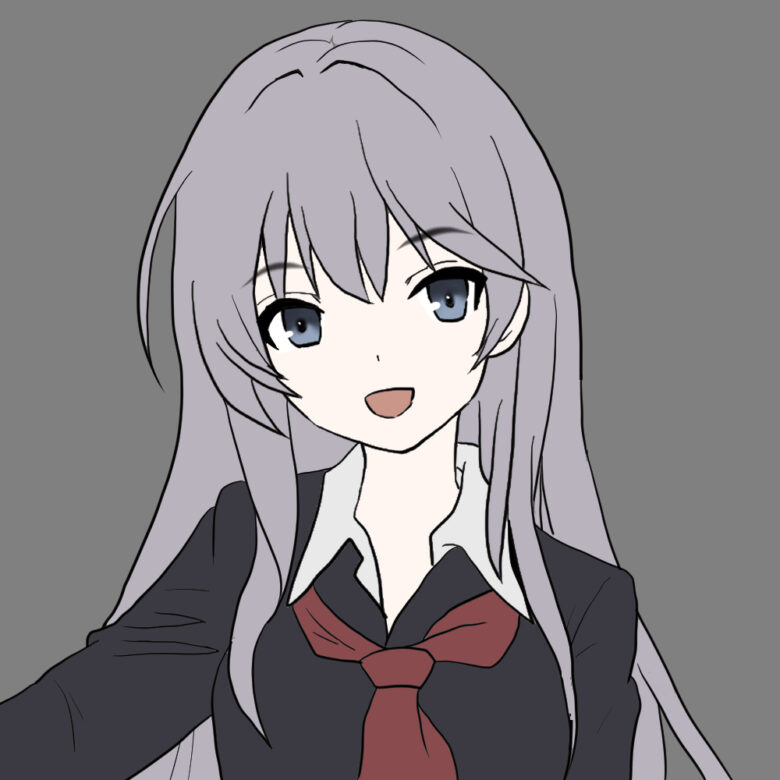
キャライラストに自動陰影を使ってみた
キャライラストで自動陰影を試したので、参考になりそうな画像をいくつかご紹介します!
使用したイラスト
夜の自動陰影
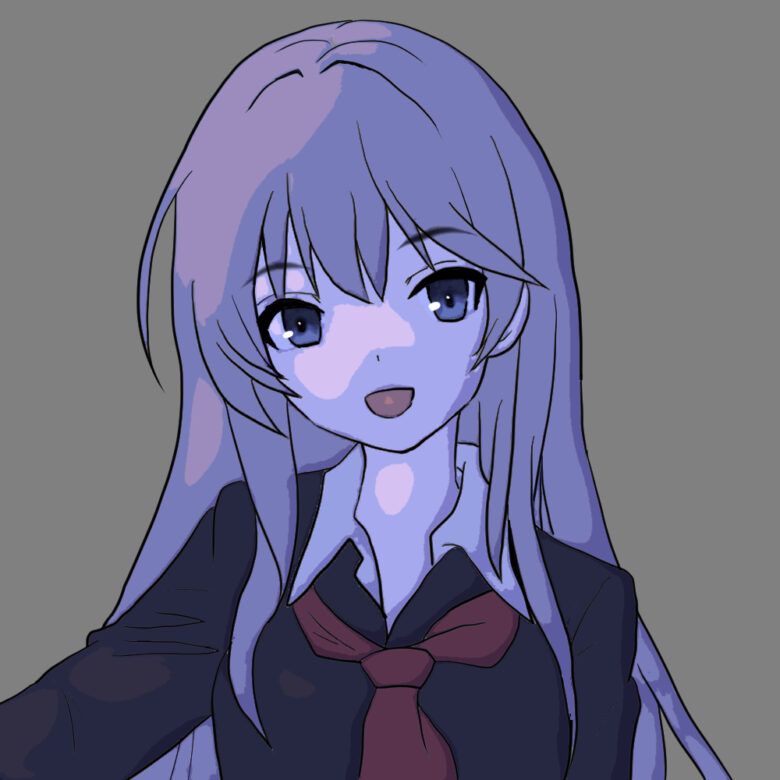
逆行の自動陰影
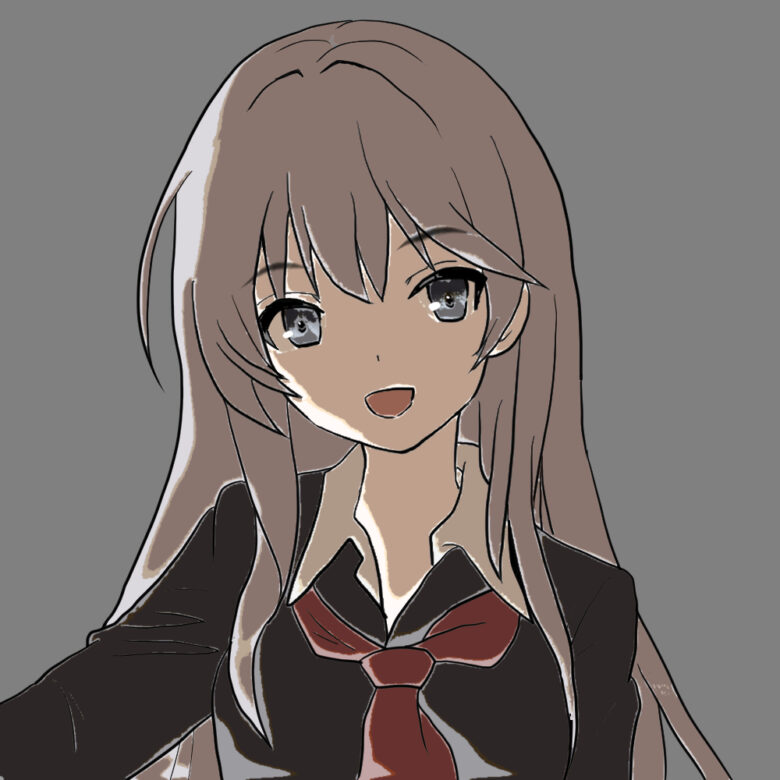
ステージカラー
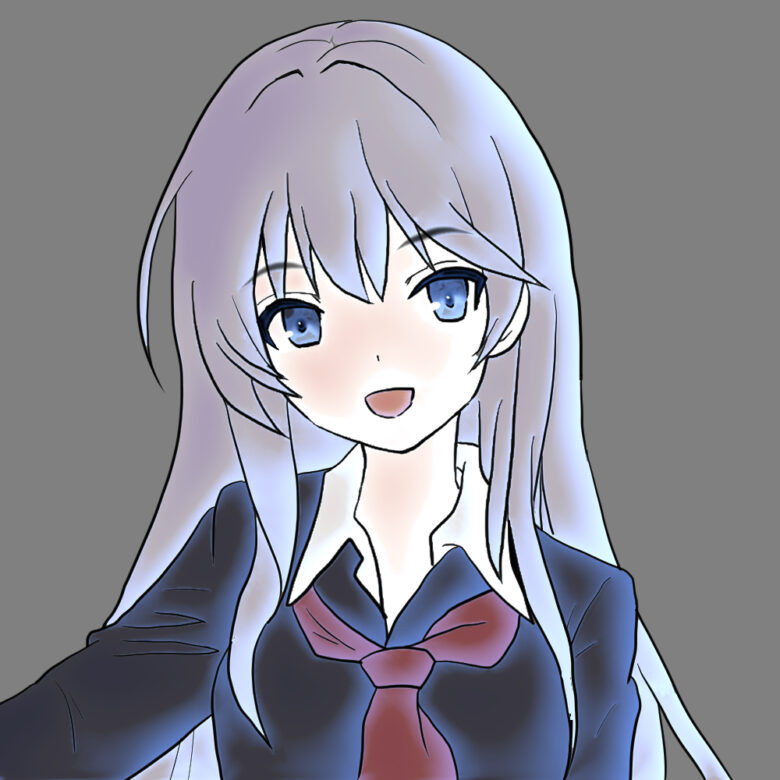
線が多いキャラでも、それっぽい陰影になるのでここから微調整して仕上げするみたいな時短にも使えそうだなと思います!
自動陰影の各種設定については以上です!
クリスタ機能関連記事

おわりに
クリスタ2で追加された自動陰影についてご紹介しましたが、いかがでしたでしょうか?
自動とは思えない精度なので、陰影苦手な人には非常に便利な機能だと思います!
色々応用できそうな気もするので、なにか思いついたらコメントに書いてもらえると嬉しいです!(笑)
本記事は以上になります。
長文を読んでお疲れだと思いますが、最後まで読んでいただきありがとうございます!
また次の記事でお会いしましょう!!!
明日は何を書こうかな?
コメント